Welcome to Max Lopez' Portfolio

To scroll through my projects, you can use the scroll wheel, the arrow keys, or just click with your mouse.

Website concept, design & content by Max Lopez

Website programming by David Schneider

Introduction

Hi, I’m Max! I’m currently a masters student at Boston University where I am studying Product Design and Manufacture. I was previously at Rensselaer Polytechnic Institute where I earned a dual B.S. in Design, Innovation, Society & Business Management. I hope you enjoy viewing my portfolio where I showcase my skills in design thinking, prototyping, CAD, and more.

Stylophone Player

Summer 2024

Crafting a Cartesian Motion Creation
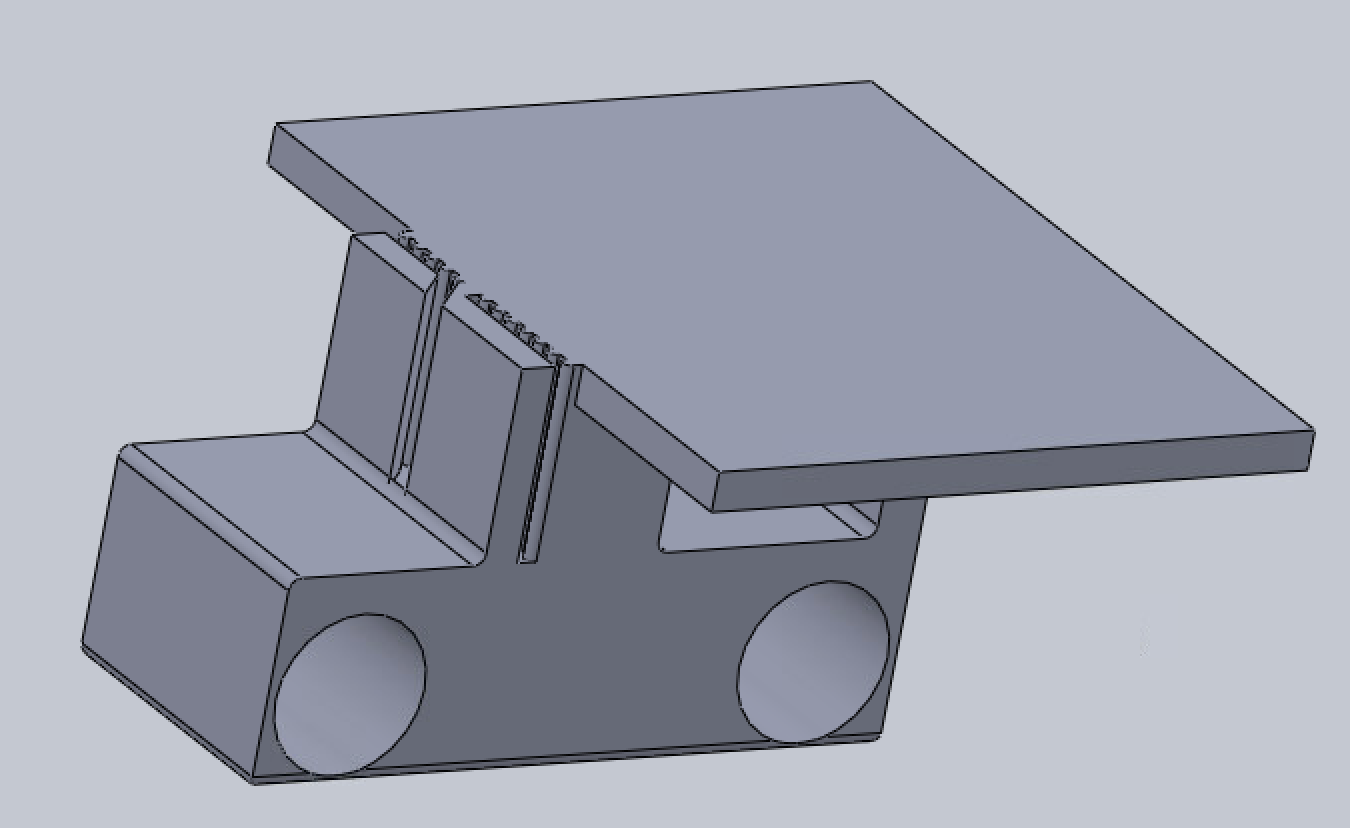

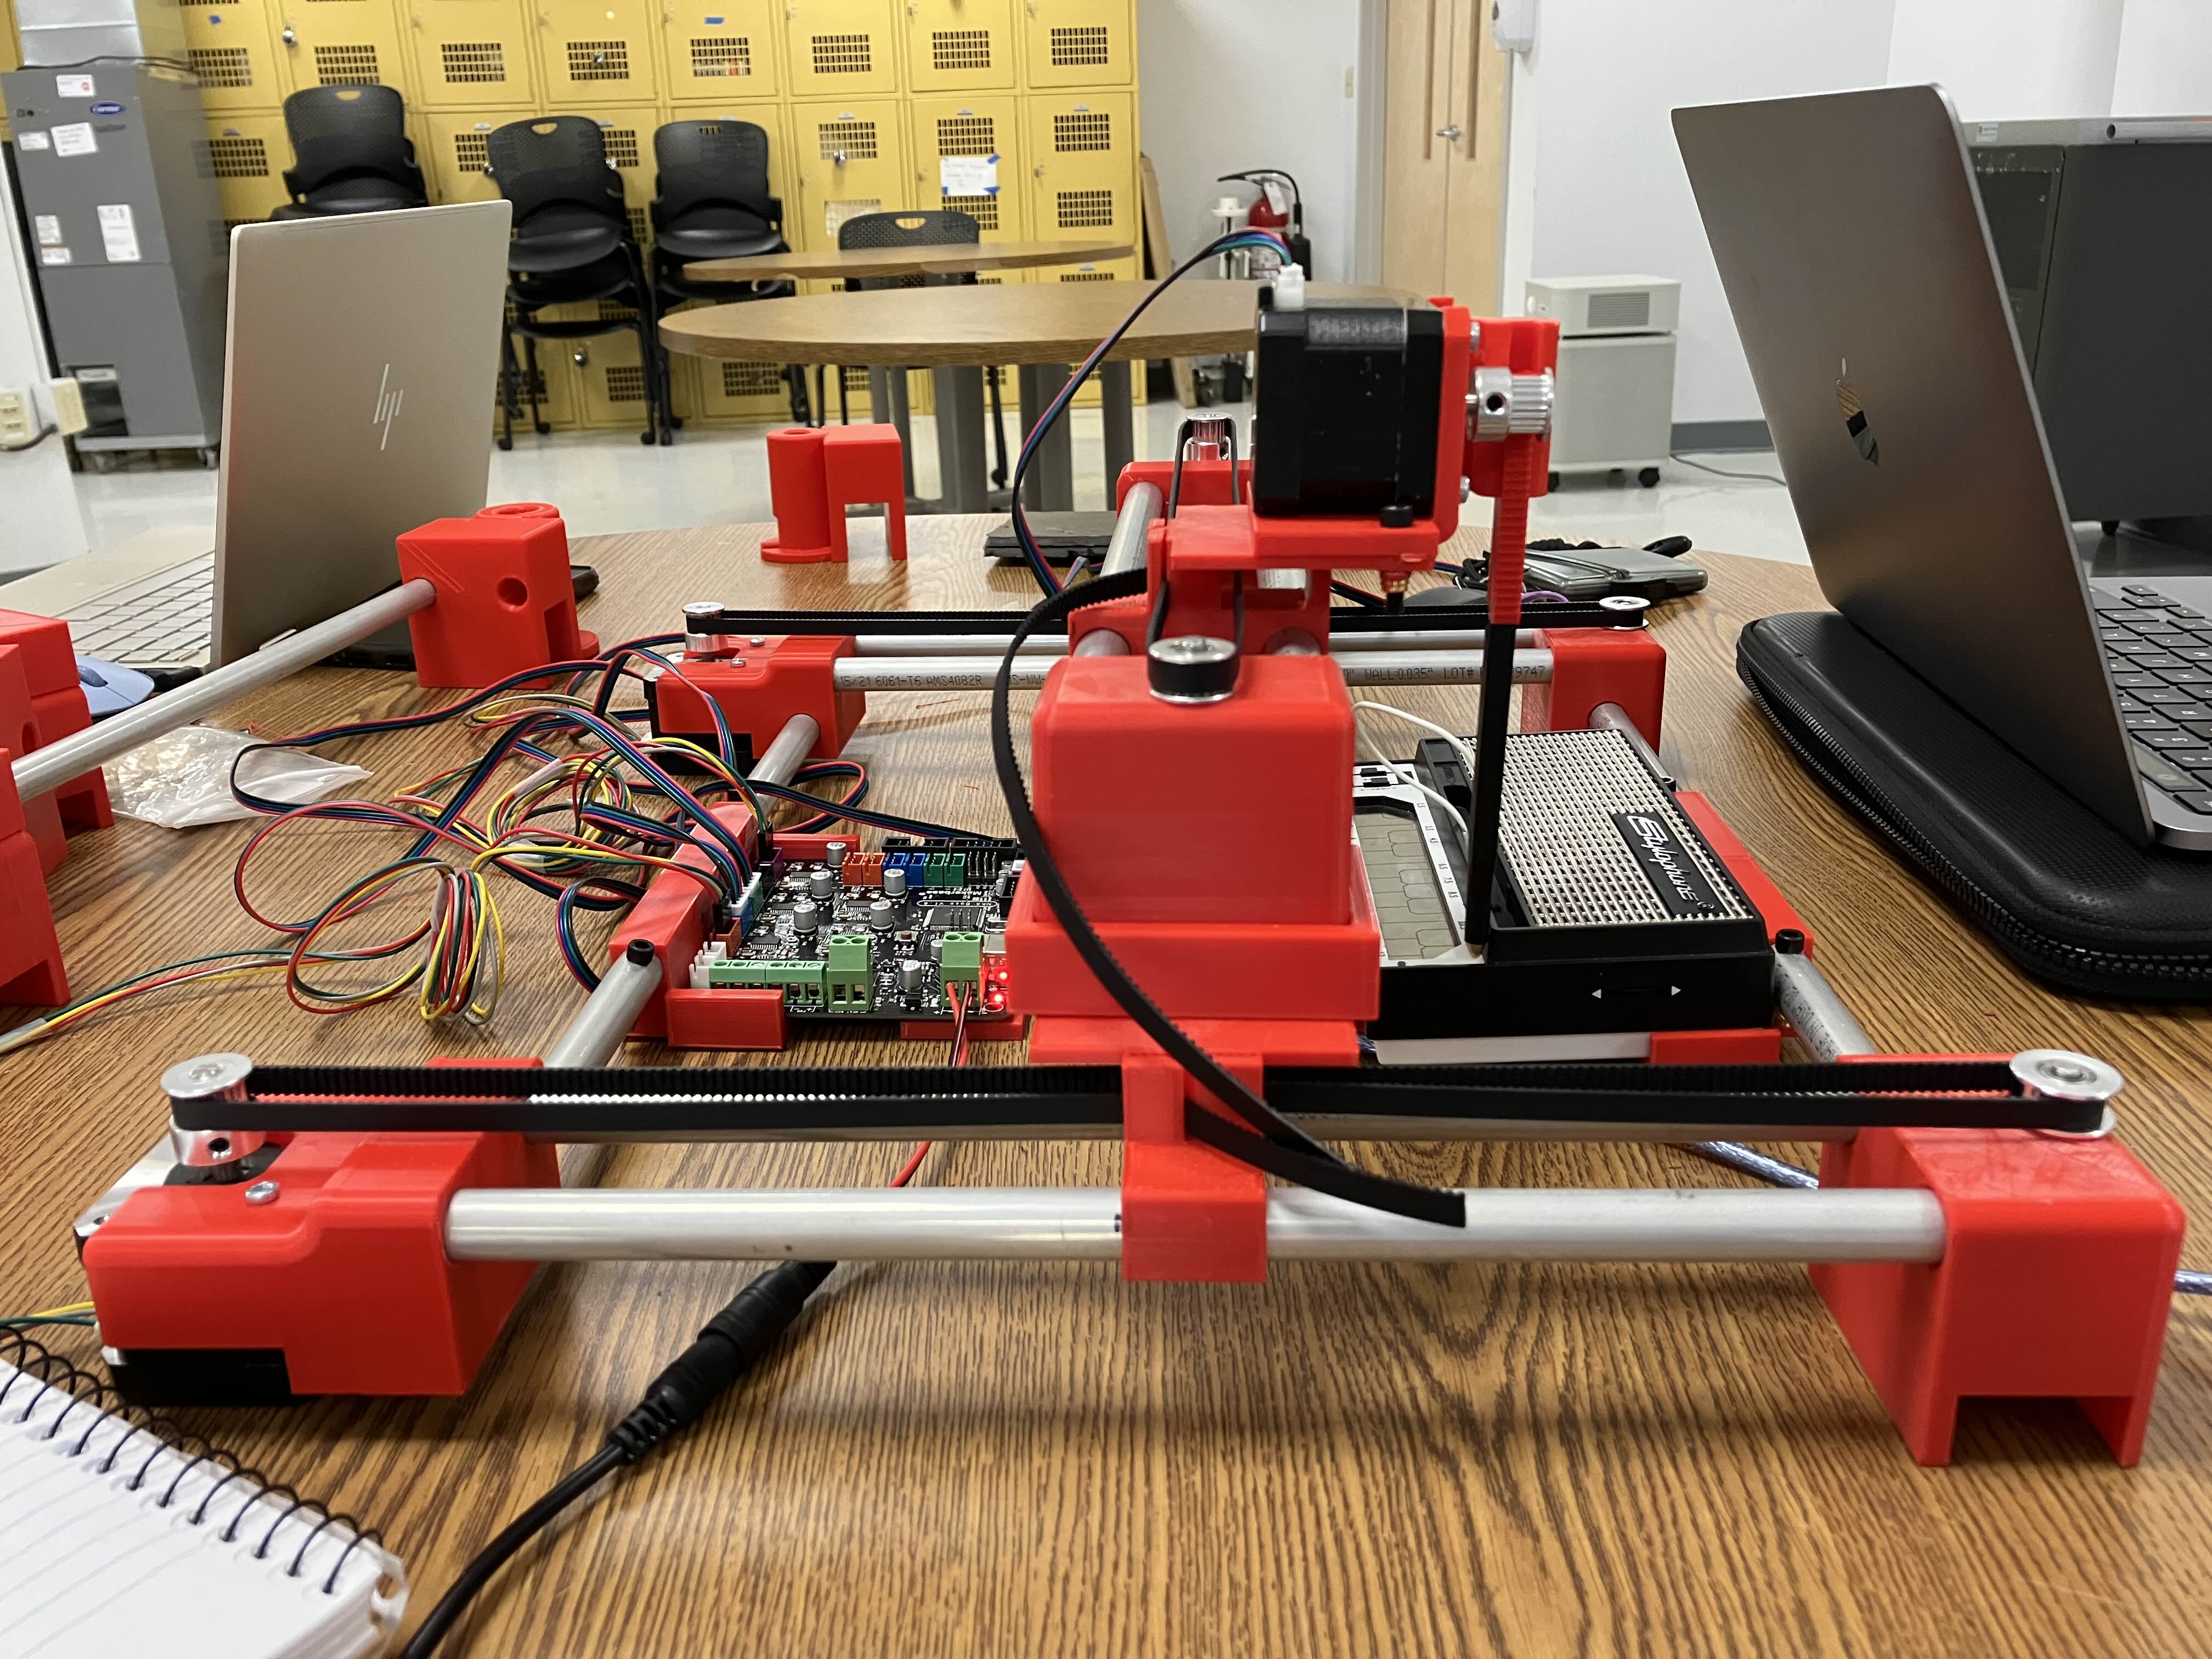
During a product design course I took in Summer 2024, I was tasked with designing a 3D Printed, custom designed device that has 2.5 degrees of movement freedom. My team of three quickly determined that we wanted to create a device that could play a musical instrument known as a "Stylophone". The stylophone is a small piano-like device that uses a pen with a metal tip, wired to the Stylophone, to play electronic notes. We concluded that the pen already being part of the Stylophone would ensure that it would work well as long as we could get it to move around correctly, and that making a device that could play a physical instrument just sounded like fun. We first sketched what a singular, modular linear actuator would look like, primarily to get measurements down. Then, we created a sketch of what we envisioned the entire unit to look like, making sure to add some extra supports so the unit could remain stable.

Our next goal was to perfect a single linear actuator that would then be replicated to create the three actuators of the final device. Our first iteration functioned fine but would go through numerous iterations, whether that be due to changing the rod thickness, adjusting the heights of the two ends, or accounting for how everything needed to connect to one another. Each group member designed a component for this stage, with my component being the carriage. The biggest hurdle was designing the "teeth" that would allow it to connect to the belt. After a long period of time designing in Solidworks and a quick 3D print, I verified that the belt fit into the teeth perfectly. When I was designing the carriage, I made it as basic as possible intentionally since I knew that even once I got one that simply "worked", I was going to have to iterate it continuously to fit within the other components around it changing. This paid off, since I ended up creating about ten separate versions of the carriage during our ideation process, most of which added on to prior versions, although some had components removed, which was also made easier by the more straightforward design.

After we ideated upon the actuator multiple times, we eventually came to a design that we liked that would be able to work for all of the required functions. Once we assembled the "frame", we knew it was time to make a component that could hold the Arduino, and a component that could hold the Stylophone. I ended up designing these, and took a similar approach to both. The major change I had to make for the Stylophone version was how I printed it, as it was slightly too large to fit on the print bed. To remedy this, I cut the unit in half and printed each half separately, and we just made sure to lock it in place in the device so that the different halves were unnoticeable.

At this point, we had a near final design but there were two critical issues that we needed to address. Firstly, the Arduino code was just not working. We were usually able to move some part of the device, but never in the way we wanted it to. This would result in multiple meetings dedicated to just working through the code, bouncing ideas off of each other, and slowly but surely moving towards the Stylophone Player, well, playing the Stylophone. The other issue was the Stylophone pen, which was using both an extended tip and hot glue tread for the motor to latch onto to enable it to move up and down. This initially seemed to work, but we quickly realized that this either didn't latch on in the first place, or slowly degraded over time. We continued to recreate the hot glue tread, but time and time again, it would quickly fail. After a while, we realized that we needed something that would be consistent. We realized that since the belt moved perfectly along the motor, that means if we re-created the teeth from the carriage, it should fit. I was tasked with creating this new extension, since I had the most knowledge regarding the teeth, but it was still a difficult task, as I didn't have the CAD sketch anymore that I used for the carriage, so I had to recreate them from scratch. After a thankfully shorter process than the initial teeth, I managed to make a new extension piece that worked perfectly.

With this, the hardware of the Stylophone Player was complete. We first had it play a "chromatic scale", or a scale that just plays every note in order. This took a lot more trial and error than expected, as we learned that when variables such as speed changed, the device would become less precise and in turn, hit the wrong keys. Eventually, we fixed this simply by "honing in" on coordinates that would work no matter the speed. We then programmed in "The Imperial March" from the Star Wars franchise. When making the code, we designed it so that once we determined the correct coordinates, we could just enter the notes we wanted to play, and it should play them in that order. At this point, we encountered an odd error involving the pen pushing too hard down on the Stylophone, but just for the first note. We eventually figured out it was determining the Z-coordinates (how high up it was) incorrectly and that we had basically just gotten lucky for the chromatic scale, so we fixed this for both songs.

I am happy with how this project turned out and would consider it a success. We set out to create a device that could play a Stylophone by itself, and we accomplished exactly that. I learned a lot of valuable lessons from this project, especially since it was incredibly involved and hands on. I improved my CAD/Solidworks workflow, gained a much better understanding of electronic wiring and Arduino, further understood the strengths and limits of 3D printing, and improved my modular design thinking, both in how to apply it, but also when to use it. I also now have a better understanding of the time, resources, and skills that go into creating a project of this caliber and scale.

Solar Display

Winter and Spring 2022

Making Marketing Materials for a Client
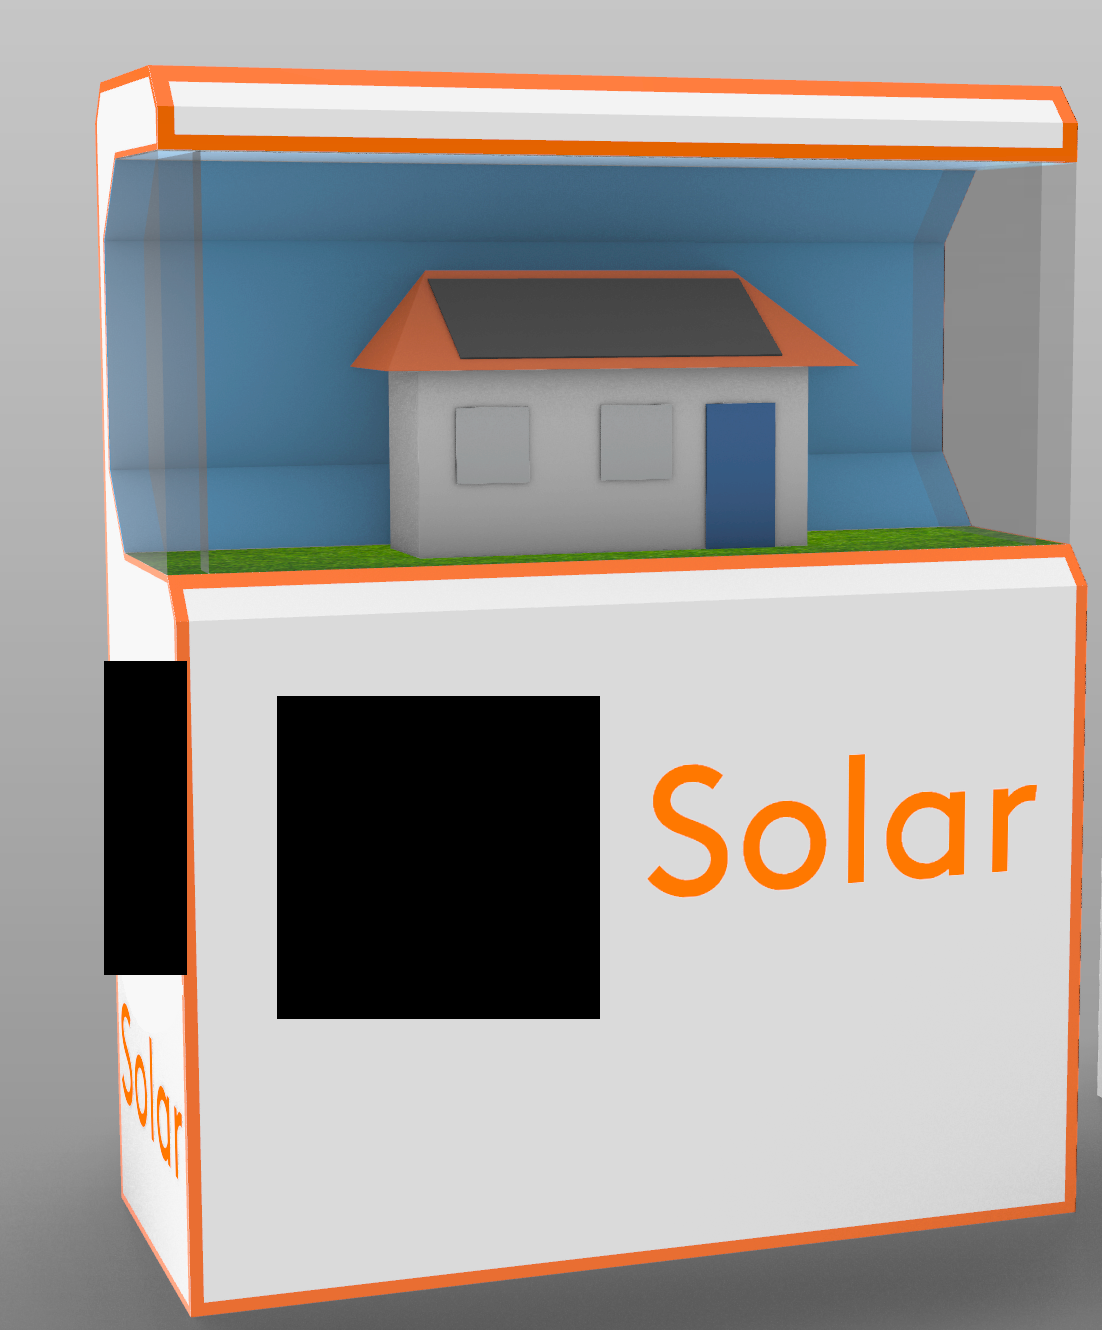

Note: The client’s name, logo, and identifying slogan have been redacted from the images and text due to an active NDA.

I created this project during an internship at Zooka Creative, a marketing agency. While I had some smaller projects I worked on at Zooka as well, my biggest focus was creating a few types of in-store displays for an upcoming launch of a solar business for a major company. One display was designed to be thin and manned by an employee and it gave me my first taste of working with a client and their project constraints. When designing this within Rhino, I went through dozens of designs in a very short period of time.

When going through this process, I made sure to have at least the prior few iterations available at all times, as well as their individual components. This not only enabled me to iterate off of the previous design very easily, but I also was able to grab components from prior designs if I ended up preferring them after all. The second display was more involved and larger, although many of the specific decisions, such as creating a model home, were my own. I went through a similar process as I did with the first design, although I received feedback more often since the design was more involved. The first prototype that I showed off to the client in a meeting was lauded by not only the client, but the rest of my Zooka co-workers. Out of all of the designs shown to the client, mine was selected to be further developed into a full product.
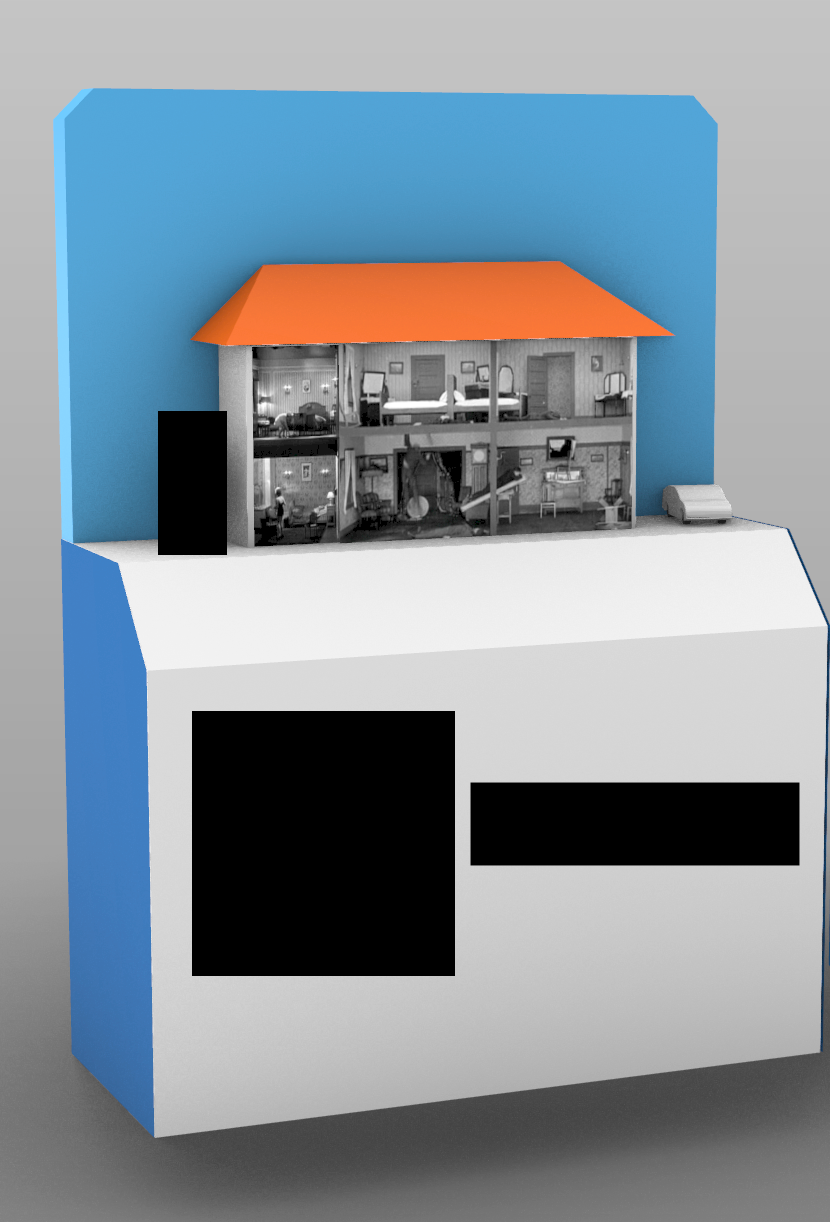
I continued to develop the prototype on my own as well as work with our content team to add graphics and make appropriate changes to make the display more “store ready”. This involved creating a blueprint that included not only the design at all angles, but an “unfolded” iteration. Although I concluded my internship at Zooka before the project was completed, I last heard that my prototype was intended to be produced into a full model and displayed at the client’s headquarters.

Ludo Learn

Winter to Summer 2021

Building a Handheld Educational Device from Scratch
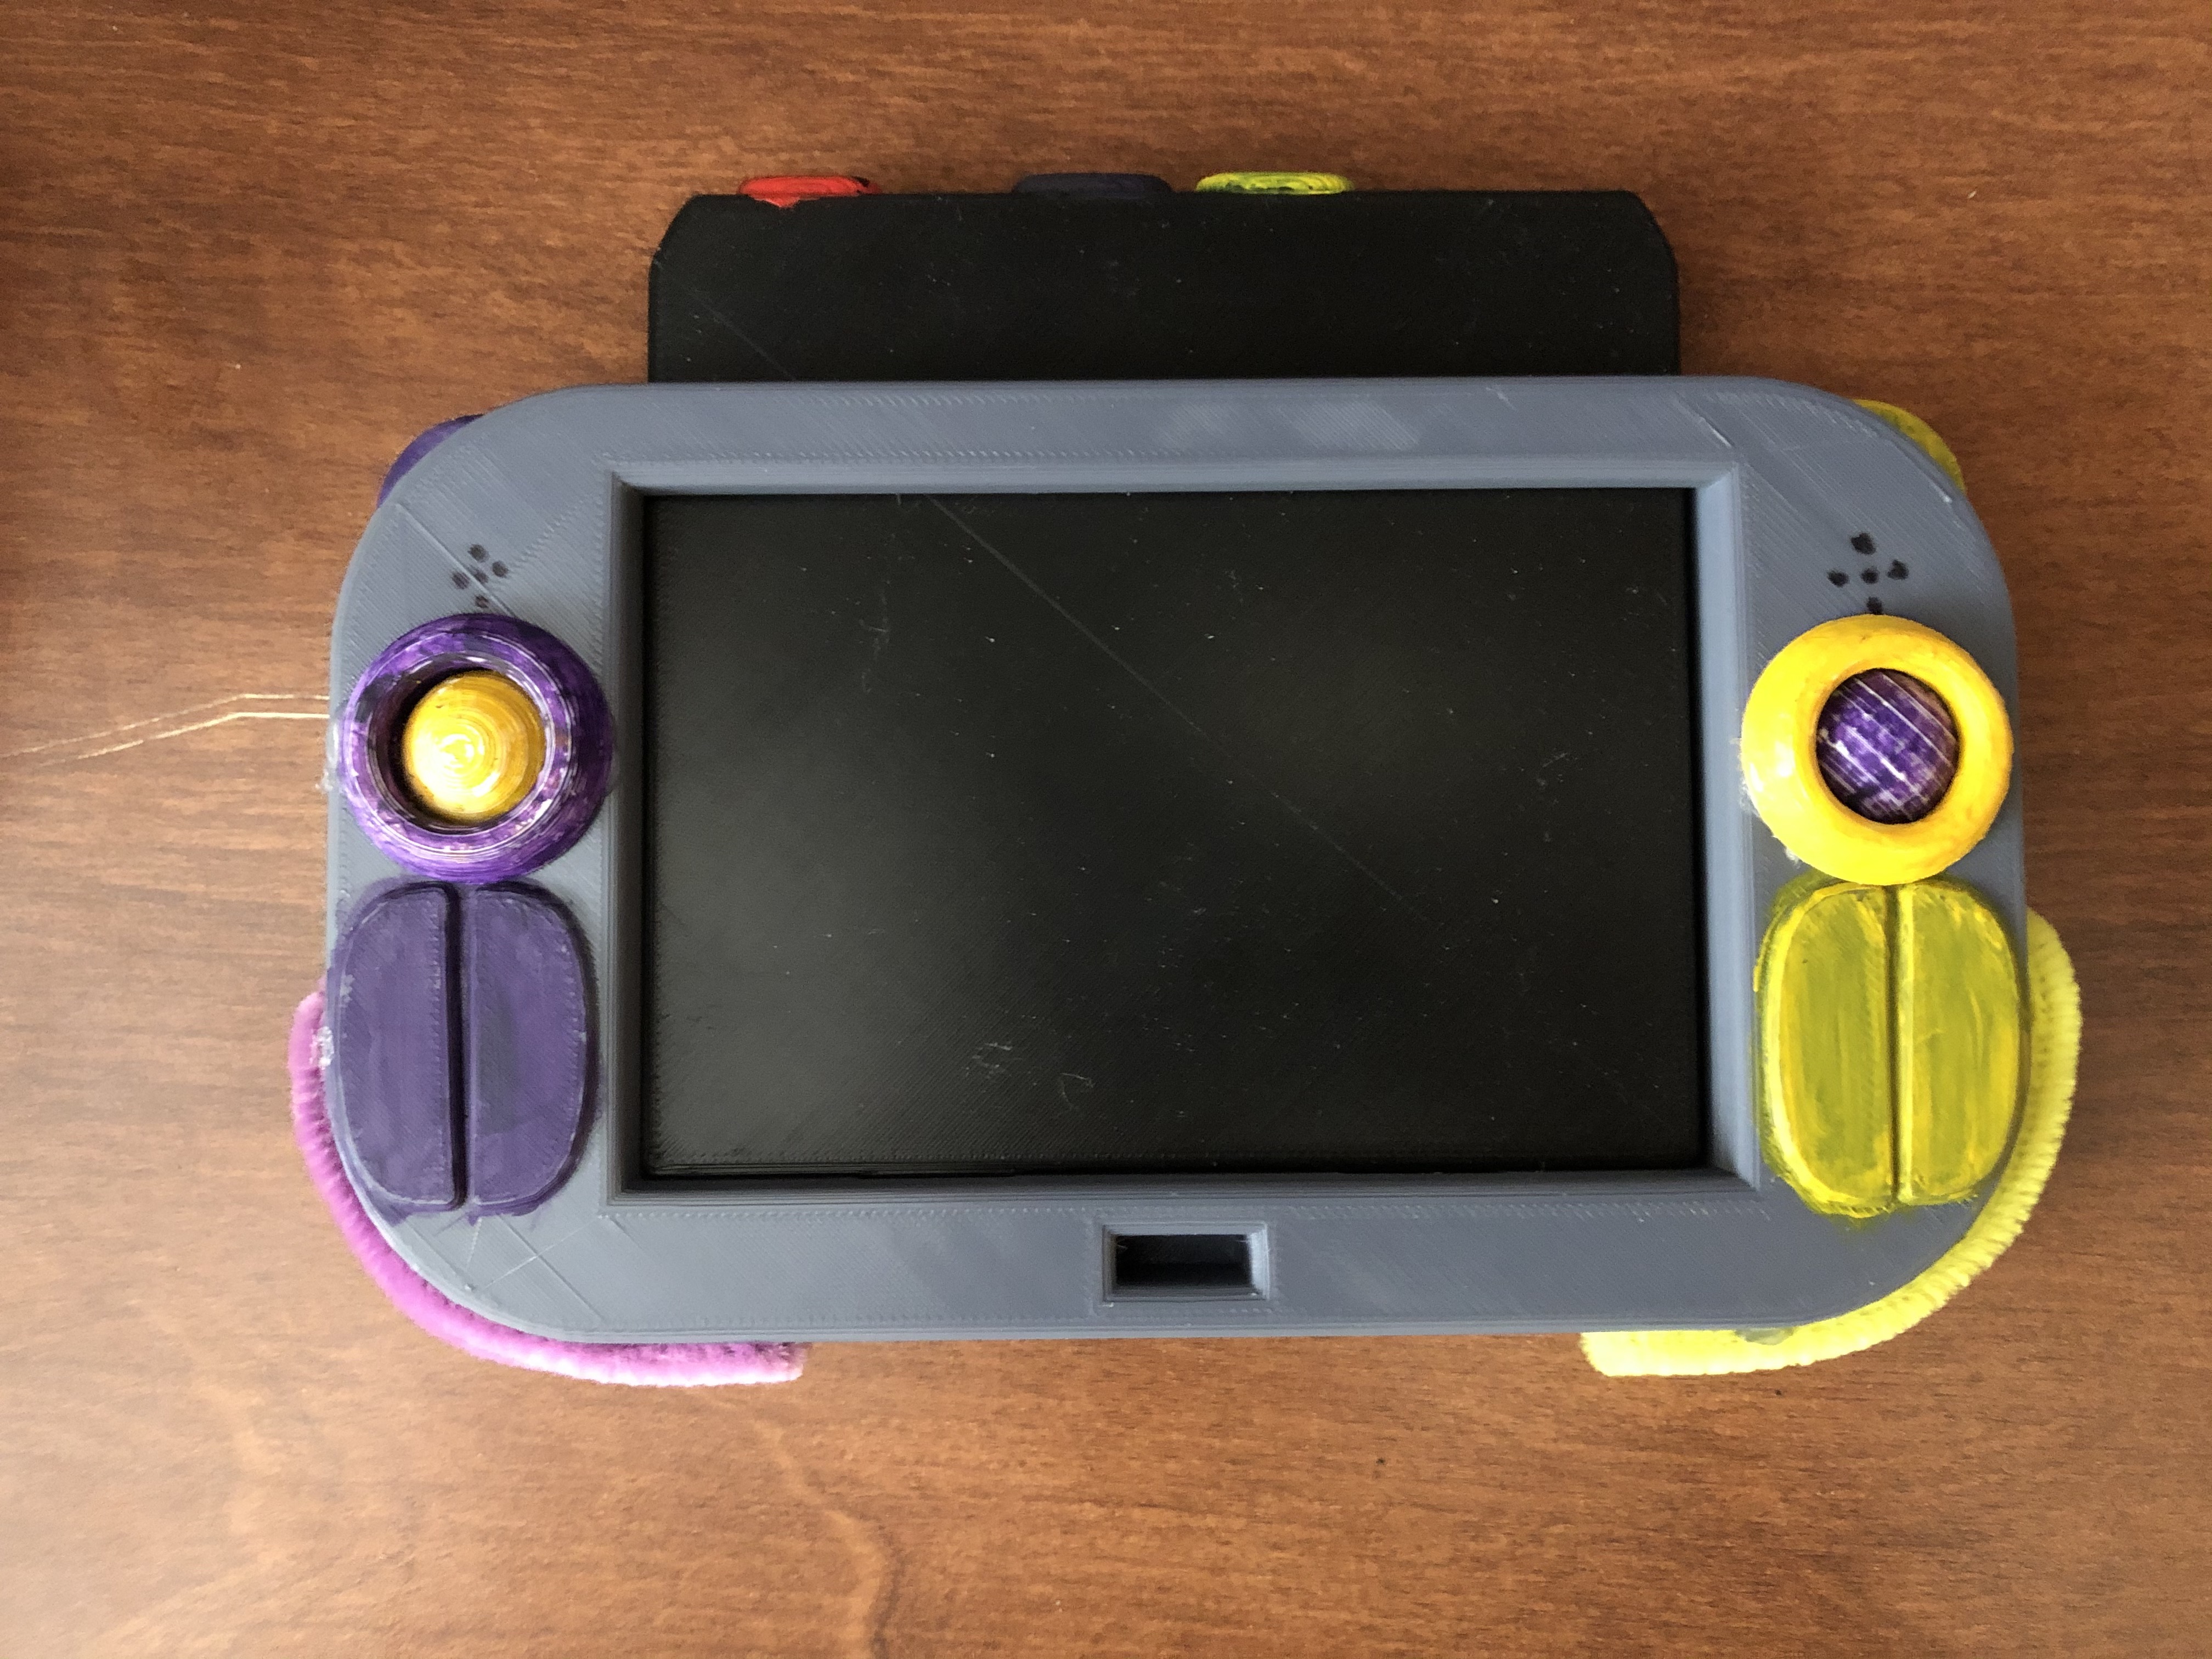

During my junior year at Rensselaer Polytechnic Institute, I was given the opportunity to design something on my own with very few restrictions. I wasn't exactly sure in what space I'd be working, but I knew that I wanted it to involve a controller or handheld device so I could see if they were as enjoyable to design as I hoped they would be. With this in mind, after eight months of on and off work, I created Ludo Learn. Ludo Learn is a system that enables "enhanced education", learning beyond the classroom, in low income, low infrastructure areas.

Before even beginning work on the design, I did particularly extensive research on educational software and “edutainment”. A large part of this was creating a survey that I sent out to multiple middle school teachers who then shared it with their students, getting hundreds of responses as a result, all of which helped guide my design going forward.
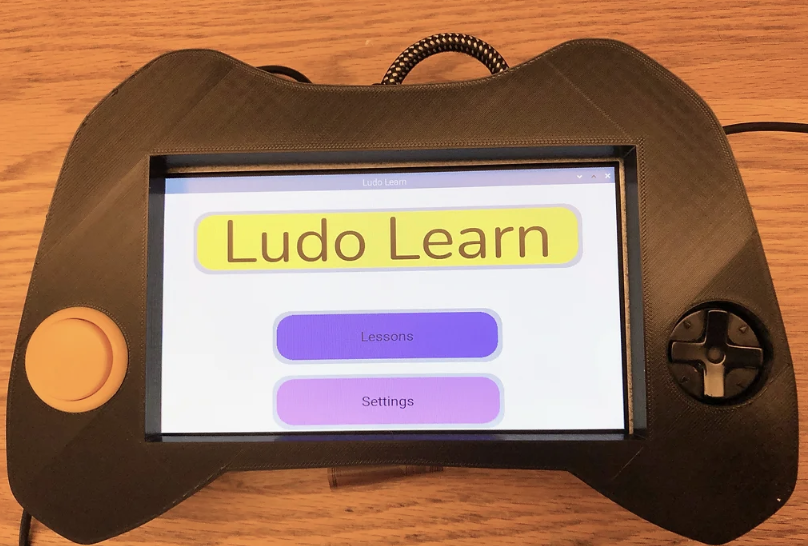
The hardware went through a few major iterations, with the first couple focusing on putting the functionality of a mouse within the form factor of a handheld. I did this since I wanted it to feel less like a video game system and closer to a traditional computer, but after user feedback and testing, I focused more on the overall shape of the design and only the most important ways the user would interact with the device.

Throughout the process, I was slowly self-learning some basic electronic skills that would enable me to get the hardware to interface with the software for my final prototype, and after getting the right components and connecting them together in the correct way, I had a fully functioning handheld device. Alongside a friend, I developed some basic software that could run on the device and be demoed, giving a clear picture of what the device would be like.

Gasket

Summer 2024

Creating a Cover That Fits Like a Glove
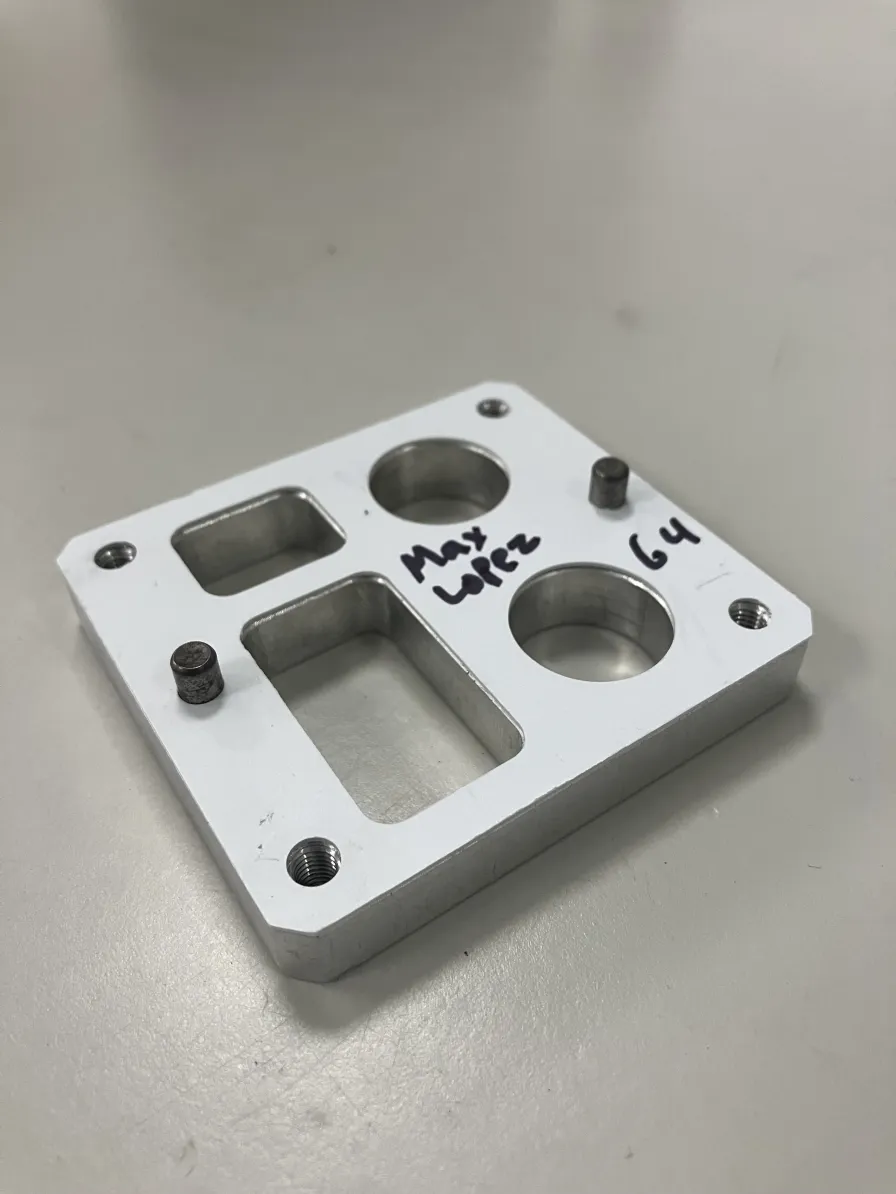

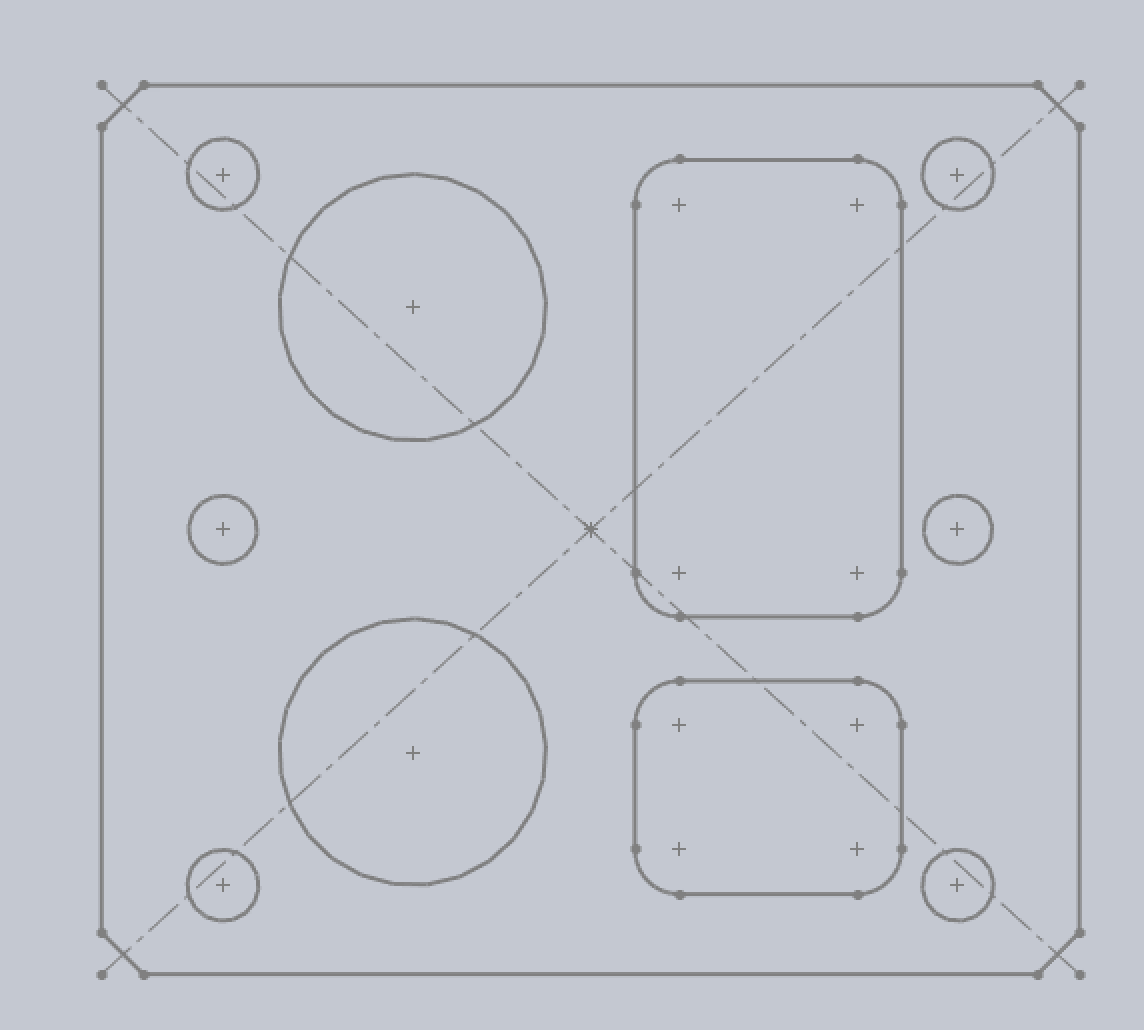
Another project from Summer 2024 was to create a gasket cover with one goal in mind: precision. Since gasket covers can be used in a wide array of mechanical designs, including some where errors of a fraction of a millimeter matter, ensuring that the otherwise simple gasket cover has the exact dimensions needed is of the utmost importance. I began by taking a multitude of measurements from the gasket using a caliper, making sure to take each measurement a few times to ensure accuracy. I then created a sketch primarily to note all of my measurements, especially since if I got all of the measurements right, I technically wouldn't even need the sketch, but of course I created one anyway just to keep everything straight.

I was then able to quickly create a sketch in Solidworks of the gasket cover. After finishing the CAD sketch, I used GibbsCAM to prepare the part for machining in BU's EPIC.
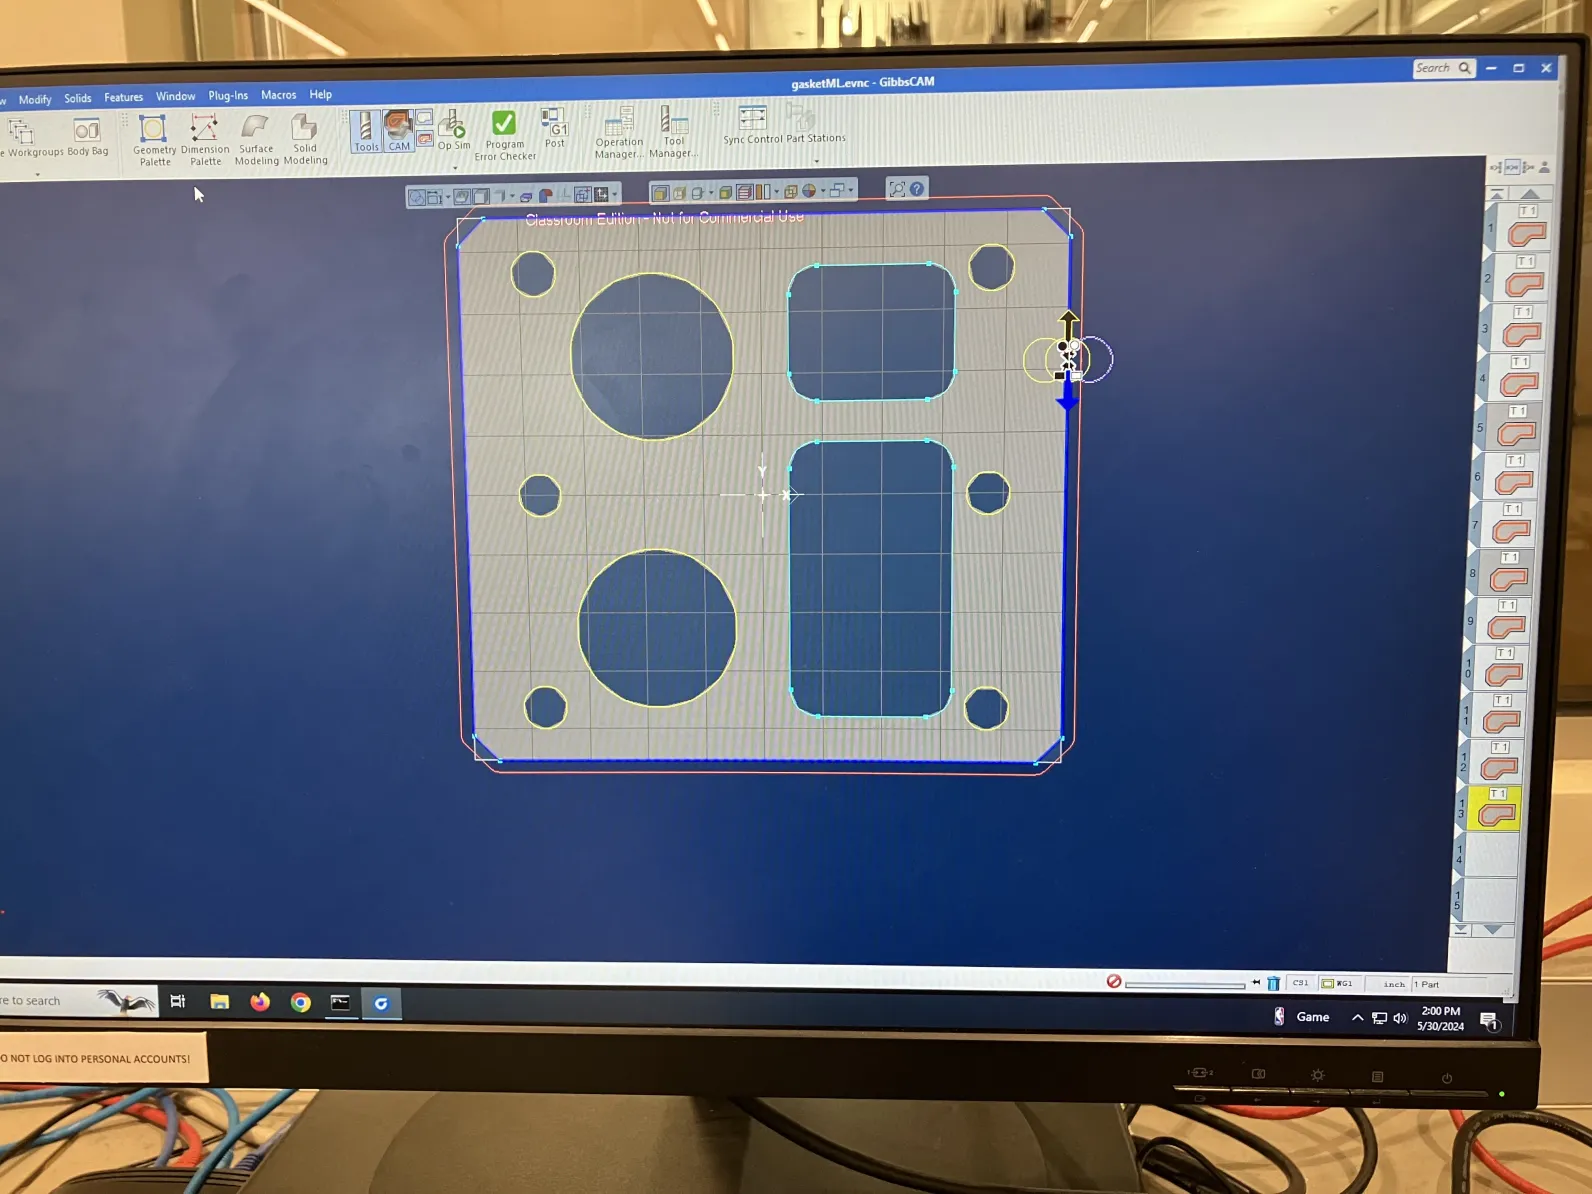
Almost immediately after milling the first iteration, I knew something was wrong. I quickly discovered that the holes on the sides were significantly misaligned. This seemed to have something to do with the radius/centering of the circles due to the distance of the misalignment.

After noticing my blunder, I quickly corrected the error within the CAD model and returned to EPIC to mill another cover. While this second iteration initially seemed to fit correctly, I later found out I had made two small yet important errors. Firstly, I had made the diameter of the larger circles slightly larger than they were supposed to be. Secondly, when I was correcting the spacing of the side holes, I had still left them slightly too close to each other.

After taking further measurements and making the necessary modifications, I milled a third and thankfully final iteration of the gasket cover. Overall, considering the speed at which this was completed and accuracy by the end, I think this was a fairly successful project. That being said, it became clear to me that measuring the gasket multiple times wasn't enough, and I should have additionally focused on checking the measurements at each stage of the process, since they may have been recreated slightly incorrectly at one stage in the process and never noticed until it was too late.

Columbo Coffee Collection

Winter and Spring 2020

Recontextualizing an Iconic Designer’s Work


This class project took place over seven weeks, and had a very specific goal: To design a set of three objects which will help prevent burns from coffee spills in the style of designer Joe Colombo. The combination of the COVID-19 lockdown occurring in the middle of this project, as well as my working with a partner for this particular project, resulted in an interesting change of pace compared to my previous design work up to this point. My partner and I were already locked down in our separate homes by the time we created our first physical prototypes, so we could only use pictures to show one another our concepts. We worked on a lid, cup, and coaster combo set that would minimize coffee burns. My partner worked mainly on the cup, and I worked on the other two components, the lid and the coaster.

In the first iteration, I failed to show one of the key features of the lid component, the liquid retrieval/guard system, and this resulted in subpar feedback from our peers. After this setback, I decided to take a 3D model approach sooner than I had planned, and this was the right call. Despite the much more positive feedback from our peers regarding this second iteration, a change arose that would need to be made to the lid which would require the entire lid to be remade, not just modified or copied. After about an hour, I managed to perfectly replicate the lid and make the change that was needed. This project allowed me to expand and show my proficiency with the Rhino CAD software, especially my ability to relate new aspects of a model to the older ones. This was not only demonstrated when I replicated the lid perfectly, but also when I had to fit the coaster and lid around the cup, which had been made separately from the other two components.